Pro Tools Library
Common Mistakes
in Fabrication, Installation & Post-installation
Pro Tools Library
in Fabrication, Installation & Post-installation
We at Caesarstone believe that being a Master of Stone means participating in an ongoing journey of learning that requires all fabricators in the stone fabrication industry to be supremely professional, with extensive knowledge and diverse skills.
To support you on this journey, we have created a guide that summarizes common mistakes in fabrication, installation and post-installation. It includes information about the causes of these mistakes and proposed solutions to prevent them. Please see the Fabrication & Installation Guide for full details.
This guide will help you to work professionally and save valuable time and money.
FALLING FROM OPEN END OF RACK OR A-FRAMES
Cause
Slabs stored on open ends of rack or A-frames
Solution
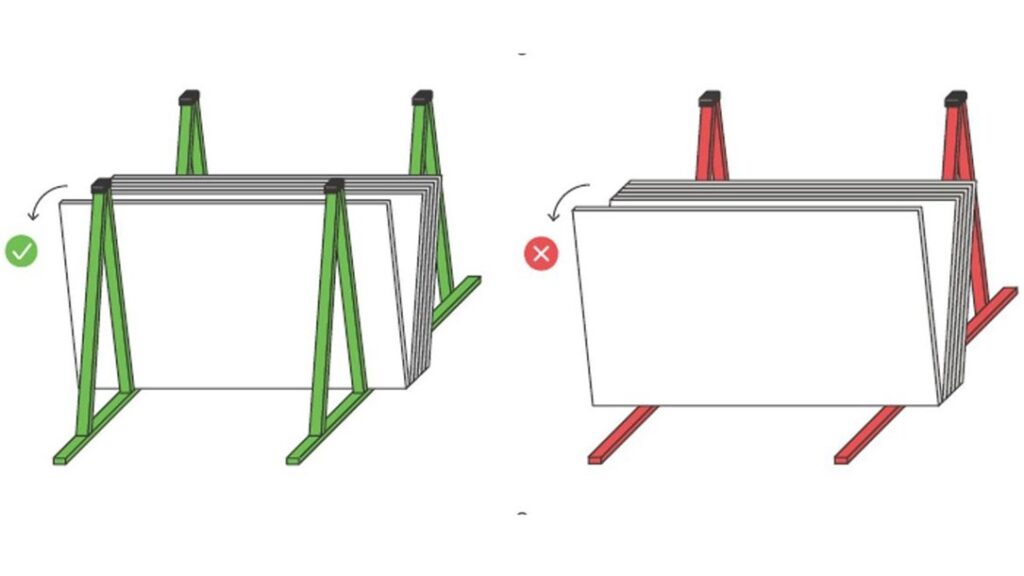
Full information on this topic can be found in the Fabrication & Installation Guide.
WARPING
Cause
Exposure to high temperatures
Solution
Store the slabs in a cool place. If this is not possible, provide additional support by building a third post on the stand, or placing a 30 mm thickness slab against the posts.
Full information on this topic can be found in the Fabrication & Installation Guide.
DISCOLORING
Cause
Exposure to UV light
Solution
Store under cover, out of direct sunlight.
Full information on this topic can be found in the Fabrication & Installation Guide.
SCRATCHES OR OTHER SURFACE DAMAGE
Cause
Polished surface exposed
Solution
Store the slabs face-to-face and back-to-back, with the backs of the outer slabs in each rack facing outwards so that the polished surface is not exposed.
Full information on this topic can be found in the Fabrication & Installation Guide.
CHIPPING
Cause
Slabs stored on metal base with no protective buffer
Solution
Place rubber buffers on the base of the stand to prevent the slabs chipping.
Full information on this topic can be found in the Fabrication & Installation Guide.

COLORS NOT MATCHING ON SEAMS OR CHANGES OF SLAB DIRECTION
Cause
Adjoining pieces are from different batches
Solution
Using slabs from the same batch for each job should ensure a color match. However, always perform a visual color match before cutting to confirm consistency in shading.
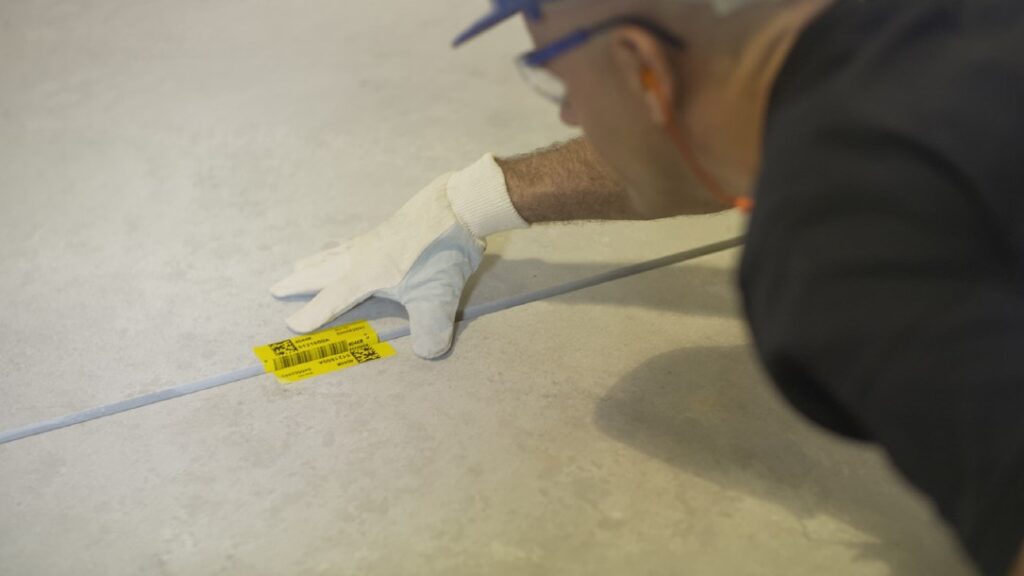
Each production cycle carries a different batch number. The batch number appears on the label affixed to all slabs and is also stamped on the back of the slab.
Full information on this topic can be found in the Fabrication & Installation Guide.
Fact: Caesarstone quartz and Caesarstone MineralTM surfaces are manufactured from natural materials.
This may result in slight color and aggregate variations between slabs and production cycles.

COLORS NOT MATCHING ON SEAMS OR CHANGES OF SLAB DIRECTION
Cause
Adjoining pieces are from different slab cuts
Solution
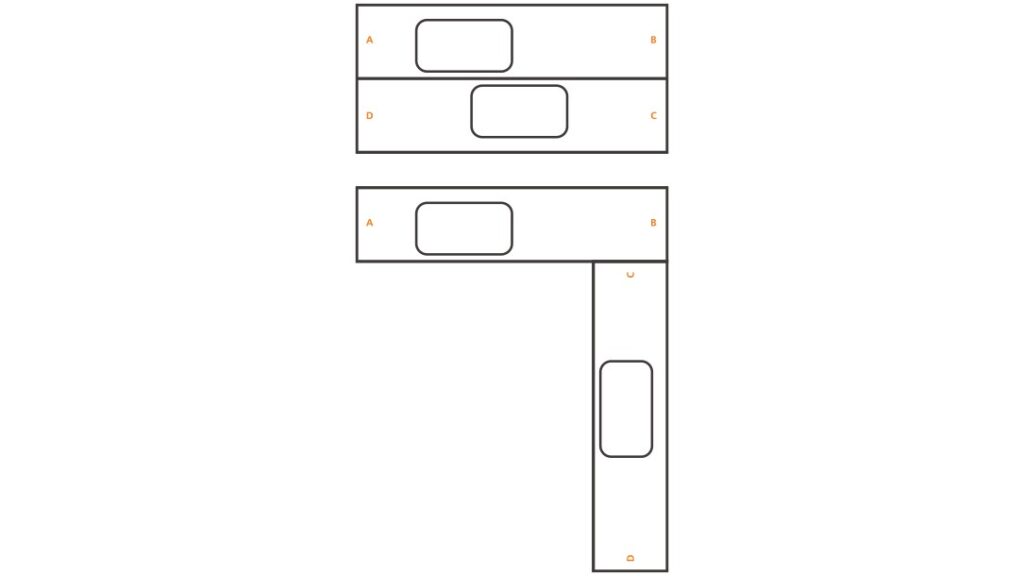
When cutting slabs, try to keep ends cut from adjoining sections of the same slab butted up together. This will provide the best match for pattern arrangement and color consistency. This is particularly recommended for installations in areas with a high amount of reflected light.
Full information on this topic can be found in the Fabrication & Installation Guide.

Example of plan of slab pieces
PATTERNS AND VEINS NOT MATCHING ON SEAMS OR CHANGES OF SLAB DIRECTION
Cause
Solution
Full information on this topic can be found in the Fabrication & Installation Guide.
Fact: New technology enables the manufacture of slabs with patterns and veins, which need to be correctly matched for best appearance.
CHIPPING ON EDGE PROFILES
Cause
Sharp edge profiles
Solution
Do not create sharp edge profiles as impact may cause chipping. Edge profiles should be rounded or beveled with a minimum edge profile of 3 mm (1/8"), but preferably 4-6 mm (3/16-1/4”).
The larger the surface area of the edge profile, the more resistant it is to chipping.
Full information on this topic can be found in the Fabrication & Installation Guide.

CRACKS EMANATING FROM SINK/COOKTOP CUTOUTS
Cause
Insufficient/incorrectly fabricated radius on cutouts
Solution
Full information on this topic can be found in the Fabrication & Installation Guide.

SEAMS OPENING • SEAM APPEARANCE • ADHESIVE STAINS AROUND SEAMS
Cause
Solution

Do not polish seams on Caesarstone surfaces!
Full information on this topic can be found in the Fabrication & Installation Guide.
FABRICATOR POLISHED SURFACE AND MADE IT INCONSISTENT WITH THE ORIGINAL FACTORY FINISH
Cause
Polishing the surface to try to remove scratches, imperfections or to level the surface.
Solution
Do not polish the surface or seams to remove scratches, imperfections or to level the surface as this will create a polishing level inconsistent with the original factory finish. Please speak with your Caesarstone technical consultant.
Full information on this topic can be found in the Fabrication & Installation Guide.
CRACKS APPEARING POST-INSTALLATION
Cause
Uneven or unstable cabinets
Solution
Full information on this topic can be found in the Fabrication & Installation Guide.


CRACKS APPEARING POST-INSTALLATION
Cause
Insufficient support, particularly on long seams or void areas
Solution
Full information on this topic can be found in the Fabrication & Installation Guide.
ADHESIVE OR SILICONE RESIDUE LEFT ON COUNTERTOP AFTER INSTALLATION
Cause
Countertop not properly cleaned after installation
Solution
Thorough post-installation cleaning of dried adhesive or silicone residue is of paramount importance as it reduces time-consuming and costly remedial work.
Wear rubber gloves for this procedure.
Full information on this topic can be found in the Fabrication & Installation Guide.
FACTORY SURFACE FINISH DAMAGED BY USE OF UNSUITABLE CLEANING MATERIALS
Cause
Factory surface finish damaged by use of unsuitable cleaning materials
Solution
Full information on this topic can be found in the Fabrication & Installation Guide.
STAINS CAUSED BY USE OF SEALER
Cause
Use of sealer
Solution
Do not use wax, sealers or other materials that may leave a film on the countertop.
Full information on this topic can be found in the Fabrication & Installation Guide.
Click here for the full Caesarstone Surfaces Fabrication & Installation Guide.